Have you ever watched someone effortlessly flip upside down in a yoga class? It looks magical. Your heart might flutter with a mix of awe and fear. I felt that same way years ago.
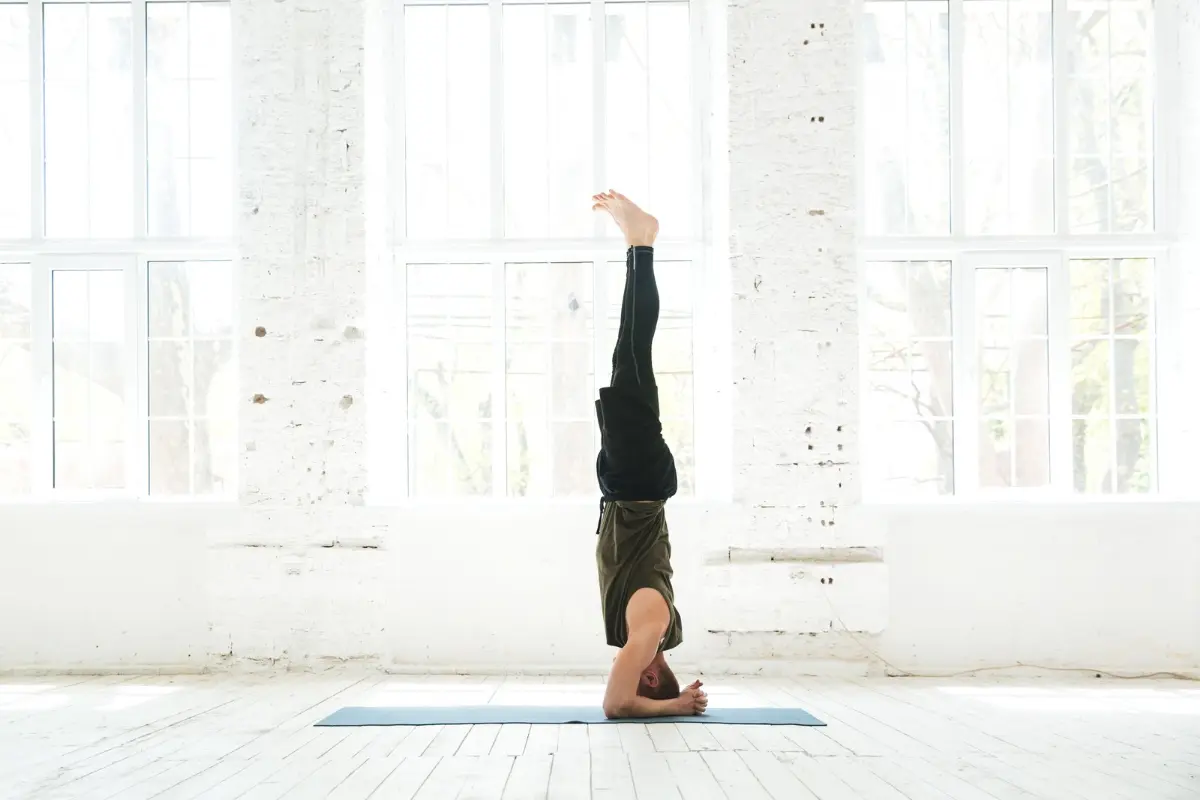
That gravity-defying posture is Shirshasana, the King of Asanas. Today, we dive deep into Shirshasana for beginners. We will unlock this powerful inversion together, step by step.
Turning your world upside down is thrilling. It shifts your perspective completely. But you might wonder if your body can handle it.
The short answer is yes, you can. With patience, proper alignment, and the right guidance, the headstand is within your reach. It is not just for advanced yogis.
This comprehensive guide will demystify the headstand for you. We will explore safe techniques, deep history, and life-changing benefits.
Grab your mat, leave your fear at the door, and let us begin this journey together.
Why Is Shirshasana Called the King of Yoga Poses?
In ancient yoga traditions, this pose holds a royal status. The name comes from the Sanskrit word “Shirsha,” which means “head.”
Ancient sages believed the head houses the seat of consciousness and wisdom. By reversing gravity, you revitalize your entire system. It acts as a master key for health.
We call it the king because it commands respect and offers unmatched rewards. It impacts every single organ in your body.
From your brain down to your toes, everything gets a fresh surge of energy. It truly is a holistic reset button.
Step-by-Step Guide: How to Do Shirshasana for Beginners
Safety is our absolute priority here. Never rush into an inversion. Your neck and spine require ultimate care.
Follow these steps mindfully, and listen to your body at every single stage.
Step 1: Build a Strong Foundation
Start by kneeling on your mat. Place your forearms on the floor in front of you. Measure the perfect distance by holding your opposite elbows. Keep your elbows exactly right there. Now, interlock your fingers securely to form a stable, triangular basket.
Step 2: Position Your Head
Place the very crown of your head on the mat. The back of your head should rest snugly against your cupped hands. Do not press your weight into your fingers. Instead, hug your hands firmly around your skull for support.
Step 3: Lift Your Hips
Tuck your toes under securely. Straighten your legs and lift your hips high into the air. Your body will look like an upside-down ‘V’ shape. This action immediately activates your core and shoulders.
Step 4: Walk Your Feet In
Slowly walk your feet closer toward your face. Keep your spine as straight as possible. Stop walking when your hips are stacked directly over your shoulders. You will feel your weight shift upward.
Step 5: Engage Your Core and Lift
Press your forearms firmly into the ground. Push the floor away to protect your neck. Draw your belly button tightly toward your spine. Gently bring one knee into your chest, then the other. Hold this tucked position until you feel completely balanced and steady.
Step 6: Extend Your Legs Upward
Once your balance feels rock-solid, slowly extend your legs toward the sky. Squeeze your inner thighs together tightly. Flex your feet and reach through your heels. Breathe smoothly and deeply through your nose. Hold for 3 to 5 breaths initially.
Step 7: Exit with Grace
To come down, slowly bend your knees back into your chest. Lower your feet to the mat with total control. Immediately rest in Child’s Pose for at least five full breaths. This allows your blood pressure to normalize safely.
Physical Benefits of Headstand: Total Body Transformation
The physical rewards of this pose are immense. When you practice regularly, your body undergoes a beautiful transformation.
Let us look closely at what happens under the surface.
Boosts Blood Circulation
Gravity usually pulls everything downward. Flipping upside down completely reverses this constant pull.
It sends a fresh, oxygen-rich supply of blood straight to your brain.
“Inversions flip the script on your circulatory system, giving your heart a well-deserved break while pooling fresh oxygen in the upper body.” — Senior Yoga Medicine Educator
This process filters toxins out of your lower extremities quickly. You will notice your legs feel lighter and less fatigued.
Strengthens Your Core and Upper Body
You cannot do a headstand with a lazy core. Holding the posture requires intense abdominal engagement. It builds deep structural strength in your obliques and transverse abdominis.
Shoulder stability: Your deltoids work hard to keep you lifted.
Back strength: Your latissimus dorsi keeps your spine perfectly erect.
Neck safety: Your deep neck flexors activate to maintain a safe alignment.
Improves Digestion and Metabolism
Gravity also pulls on your digestive organs, often causing sluggishness. Shirshasana gently shifts these organs out of their usual positions.
It relieves trapped gases and stimulates efficient elimination. It acts like a natural, gentle massage for your intestines.
Enhances Skin and Hair Health
Want a natural, youthful glow? The increased blood flow to your face delivers vital nutrients to your skin cells. It flushes out impurities naturally.
It also nourishes the hair follicles on your scalp. Many practitioners notice shinier hair and fewer breakouts over time.
Mental Benefits of Both Physical and Emotional Balance
The magic of Shirshasana extends far beyond the physical body. It touches the mind in profound, unexpected ways.
Sharpens Focus and Mental Clarity
Are you dealing with brain fog? A quick inversion can clear it away instantly. The rush of oxygenated blood stimulates the pituitary and pineal glands.
These glands regulate your hormones and sleep patterns. You will step off your mat feeling focused, sharp, and mentally refreshed.
Reduces Anxiety and Stress
When you go upside down, you must stay completely present. If your mind wanders, you will tip over. This intense focus forces you into the current moment.
It activates your parasympathetic nervous system, lowering cortisol levels instantly. It teaches your mind to stay calm under pressure.
Builds Deep Self-Confidence
Overcoming the fear of falling is a massive mental milestone. When you finally lift your feet off the ground, something clicks inside.
You realize you are much stronger than you thought. This newfound courage spills over into your daily life beautifully.
Breathing Techniques to Master Your Balance
Breathing is your secret weapon in yoga. Never hold your breath while upside down. Let us discuss the best way to breathe in this pose.
Ujjayi Breathing: Use this ocean-sounding breath to create internal heat and steady focus.
Diaphragmatic Breathing: Breathe deeply into your ribs, keeping your lower belly stable and engaged.
Slow Exhalations: Lengthen your exhales to calm your nervous system if you feel panicky.
Simple Modifications for Beginners and Varied Body Types
You do not have to jump straight into the full pose today. Use these smart modifications to build your strength safely over time.
The Trusty Wall Support
Move your yoga mat right against a sturdy wall. Set up your base just a few inches away from the baseboard.
Kick up gently until your heels rest against the wall. This setup eliminates the fear of falling backwards completely. It lets you focus purely on alignment.
Dolphin Pose for Arm Strength
If your neck feels weak, practice the Dolphin Pose instead. Keep your forearms down and lift your hips, but do not put your head on the floor.
This builds the necessary shoulder strength required for the full headstand later.
Yoga Blocks to the Rescue
Place two blocks against the wall. Position your shoulders directly on top of the blocks while your head hangs loosely between them.
This brilliant trick takes 100% of the weight off your delicate neck vertebrae.
Common Mistakes and How to Avoid Them
Even seasoned practitioners can fall into bad habits. Watch out for these common errors to protect your body from injury.
Dumping Weight into the Neck
This is the most dangerous mistake. Your arms and shoulders should bear 80% of your weight. Your head should only carry about 20%.
If your neck pinches, come down immediately. Press your forearms down harder next time.
Splaying the Elbows Wide
When your elbows slide outward, your foundational triangle collapses. Your base becomes unstable, placing immense stress on your wrists.
Keep your elbows pinned exactly at shoulder-width distance throughout the entire pose.
Banana Back Realignment
Do not let your lower back arch excessively like a banana. This means your core is resting.
Knock your ribs in tightly and tuck your tailbone. Keep your body straight as an arrow from top to bottom.
Ancient Roots: The Sacred History of the King of Poses
To truly understand this posture, we must look backward in time. Shirshasana is not a modern fitness trend. It is a sacred ritual practiced for thousands of years in India.
Ancient texts like the Hatha Yoga Pradipika praise this posture highly. The old sages practiced it to preserve their vital life force energy, known as Amrita.
They believed this divine nectar sat in the head and slowly dripped down into the digestive fire, burning away our youth.
By turning upside down, the sages reversed this process. They believed they could slow down time, preserve youthfulness, and achieve higher states of meditation.
When you practice, you connect with this rich lineage of ancient wisdom.
Important Safety Contraindications: When to Skip It
Yoga is about self-care, not self-destruction. Skip this posture entirely if you experience any of the following conditions:
High blood pressure or heart issues
Glaucoma or high pressure in the eyes
Recent neck, spine, or shoulder injuries
Severe migraines or vertigo spells
Menstruation (if you prefer to avoid inversions then)
Summary Table: Shirshasana Checklist
| Focus Area | Key Action to Take | Common Danger to Avoid |
| Foundation | Interlock fingers, pin elbows down. | Allowing elbows to slide apart. |
| Neck Safety | Press forearms down with power. | Dumping all weight into your head. |
| Core | Draw your belly button inward tightly. | Arching your lower back too much. |
| Eyesight | Fix your gaze on one steady point. | Moving your eyes around the room. |
Take the Leap: Your Path to Flight Starts Today
Mastering Shirshasana for beginners is a beautiful journey of self-discovery. It requires time, dedication, and deep respect for your body’s limits.
Do not rush the process. Celebrate the small victories, like lifting one foot off the floor for a single second.
Remember, yoga is a lifelong practice. The lessons you learn while balancing upside down will stay with you forever.
Are you ready to change your perspective? Roll out your mat today, practice stage one, and feel the magic happen. You’ve got this!